In today’s digital world, privacy and security are more important than ever. A VPN, or Virtual Private Network, helps protect your online data by encrypting your internet traffic and masking your IP address. While installing a VPN on individual devices is common, setting it up directly on your home router provides significant advantages: every device connected to your network—smartphones, computers, smart TVs, and IoT devices—benefits from secure, encrypted traffic without the need for individual configurations.
This guide will walk you through the process of setting up a VPN on your home router step by step. Along the way, we’ll cover essential VPN concepts, router compatibility, configuration methods, advanced settings, and troubleshooting tips.
Understanding VPNs and Router Compatibility
What is a VPN?
A VPN establishes a secure tunnel between your device and a remote server. All traffic passing through this tunnel is encrypted, which prevents third parties—including hackers, ISPs, and government agencies—from intercepting your data. VPNs can also help bypass geo-restrictions, granting access to content otherwise unavailable in your region.
Router Compatibility
Not all routers support VPNs. To determine if your router is compatible:
- Check the manufacturer’s specifications for built-in VPN support.
- Identify the router’s firmware:
- Stock firmware: Many modern routers have VPN capabilities but may support only specific protocols.
- Custom firmware: Options like DD-WRT, Tomato, or OpenWRT add advanced VPN support.
- Assess the router’s CPU: VPN encryption can be processor-intensive, and slower CPUs may reduce internet speed, especially with high-strength encryption like AES-256.
VPN Protocols
Choosing the right VPN protocol is critical:
- OpenVPN: Highly secure and widely supported but can be slower on routers with limited processing power.
- WireGuard: Modern, fast, and lightweight; increasingly popular for router installations.
- IKEv2/IPSec: Good for mobile devices and stable connections, but less common for router setups.
Pro Tip: For a household with multiple devices, WireGuard often provides the best balance of speed and security.
Preparing for VPN Installation
Before diving into router configuration, complete the following preparatory steps:
Choose a VPN Service
Select a VPN provider that offers router support and strong privacy policies. Key factors:
- No-logs policy: Ensure the provider does not track or store your online activity.
- Multiple server locations: Important for bypassing geo-restrictions.
- Custom router configuration files: Some VPNs provide pre-configured OpenVPN or WireGuard files for routers.
Backup Router Settings
Always back up your router configuration before making changes. This allows you to restore your network if something goes wrong.
Gather Necessary Information
Depending on the VPN protocol:
- OpenVPN:
.ovpnconfiguration files, username, and password. - WireGuard: Public/private keys and endpoint information.
- DNS settings: Optional but recommended for enhanced security.
Pro Tip: Make a checklist of all information to avoid interruptions during setup.
Step-by-Step VPN Setup
Step 1: Access Router Management Interface
- Connect your computer to the router via Ethernet or Wi-Fi.
- Open a web browser and enter the router’s IP (commonly
192.168.1.1or192.168.0.1). - Log in using your admin credentials.
Step 2: Locate VPN Settings
Depending on your router:
- Stock firmware: Look for “VPN Client” or “VPN” in the settings menu.
- Custom firmware (DD-WRT, Tomato, OpenWRT): Check under Services → VPN.
Step 3: Upload Configuration Files or Enter Details

- OpenVPN:
- Upload the
.ovpnfile. - Enter username and password.
- Configure advanced options like TLS authentication if required.
- Upload the
- WireGuard:
- Enter private key, public key, endpoint, and allowed IPs.
- Enable the interface.
Pro Tip: Some routers require enabling a startup script or service for the VPN to start automatically after a reboot.
Step 4: Configure Firewall and DNS
- Ensure firewall rules allow VPN traffic.
- Optionally, set DNS servers provided by your VPN to prevent leaks.
Step 5: Test the Connection
- Check your public IP via a service like
https://whatismyipaddress.com. - Confirm the location matches the VPN server.
- Test multiple devices to ensure all traffic routes through the VPN.
Step 6: Troubleshooting Common Issues
- VPN won’t connect: Double-check credentials and configuration files.
- Slow speeds: Consider switching VPN protocol or server location.
- Devices not routing through VPN: Verify routing rules or firewall settings.
Advanced Router VPN Settings
Split Tunneling
Allows certain devices or services to bypass the VPN while others remain protected. Useful for:
- Gaming consoles that require local connections.
- Streaming devices accessing local content.
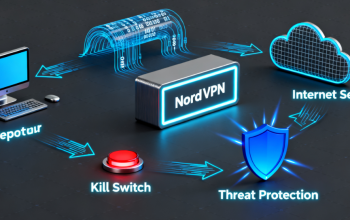
Kill Switch
Some routers support a kill switch feature that cuts internet access if the VPN drops, preventing accidental exposure.
Performance Optimization
- Adjust MTU (Maximum Transmission Unit) to reduce packet fragmentation.
- Use lightweight encryption on routers with slower CPUs.
- Select VPN servers geographically close for lower latency.
Firmware Updates
Regularly update router firmware to patch vulnerabilities and improve compatibility with VPN protocols.
Common Questions and Solutions
Q1: VPN slows down my internet—what can I do?
- Switch to WireGuard if supported.
- Select a closer server geographically.
- Reduce encryption level if security requirements allow.
Q2: VPN disconnects after router reboot—how to fix?
- Ensure “Start on boot” or “Auto Connect” is enabled.
- Double-check firewall settings.
Q3: Can all devices on my network use VPN?
- Yes, if the VPN is installed on the router. Devices connected via Wi-Fi or Ethernet automatically route through the VPN.
Setting up a VPN on your home router is a powerful way to protect every device in your household. While the process may initially seem complex, careful preparation, understanding your router’s capabilities, and following step-by-step instructions make it achievable. Advanced settings like split tunneling, kill switches, and performance optimization further enhance your home network security and usability.
By taking the time to configure your router VPN properly, you ensure that your online activity remains private, secure, and unrestricted, regardless of the devices you use or the networks you connect to.